Excel Printing
|
|
|
|
|
|
|
|
|
|
|
|
|
|
Excel Printing
Additional Resources
Excel Printing
Excel Printing | Microsoft Excel XP |
 |
 |
What's on this page... Print Preview Print dialog box |
Excel Printing - Print Preview
Once you're done with you worksheet, you might have to print it. Microsoft Excel helps you with this easily, because this is definitely not a difficult task to do.Before you print a worksheet, check it first in Print Preview, and make sure that it looks the way you want it to.
| |
 |
Q: "Where's my borders?" Print Preview displays, and print, only the borders that you've drawn. The grey lines in a normal worksheet are called gridlines and are non-printable. |
In print preview you can adjust your page settings to fit your data.
There are several steps to follow if your data doesn't fit on the page.
Check the Paper Size and Orientation
| 1. | In Print Preview mode, click on the Setup... button at the top of the window. |
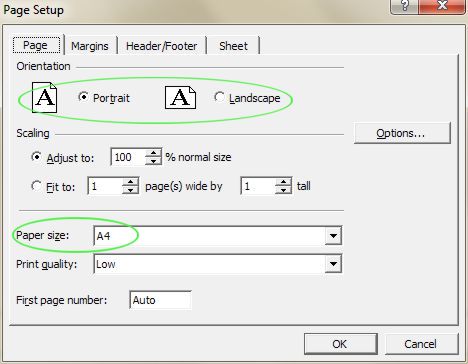
| 2. | From the Page Setup dialog box, choose the Page tab. |
 |
|
| 3. | Change the Orientation from portrait to landscape, if you desire. |
| 4. | Make sure the Paper Size is the correct size. |
| 5. | From the Scaling area, choose Fit to 1 page(s) wide by 1 tall to make your content fit to the current page. |
| 6. | Click OK. |
Check the margins.
| 1. | In Print Preview mode, click the margins button at the top of the screen. |
| 2. | Notice that Excel has added 6 dotted lines to your page. These represent the margins for top, bottom, left and right, as well as the margins for the header(top) and footer(bottom). |
| 3. | You can drag these dotted lines to make room for content that doesn't quite fit on the page. |
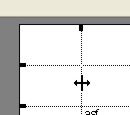
| 4. | Place your mouse pointer over the margin's dotted line whom
you want to move. The mouse arrow changes to a double-headed arrow. |
 Drag the margin to resize the
print area
 |
|
| 5. | Click and drag the margin outwards to increase the print area of the page. |
If you are sure all your Excel printing settings are correct, you can simply click the Print button at the top of the window.
| Back to Top |
| Return to Excel XP from Excel Printing |
Excel XP Topics
- Tips- Excel Screen Layout
- Navigational Techniques
- Working with Workbooks
- Templates
- Working with Worksheets
- Moving Around
- Move Worksheets
- Copy Worksheets
- Insert & Delete Cells
- Insert & Delete Rows
- Insert & Delete Columns
- Resize Row
- Resize Column
- Editing Data
- Content Color
- Cell Color
- Number Formats
- Fonts
- Alignment
- Text Direction
- Indent Contents
- Merge Cells
- Copy
- Move
- Undo & Redo
- Using Zoom
- Freeze & Unfreeze Titles
- Split Worksheet
- Spreadsheet Data
- AutoFill
- AutoComplete
- Comment
- Find
- Replace
- Spellcheck
- Formulas
- Functions
- Password
- Sorting
- AutoFilter
- Advanced Filter
- Macros
- Charts
- Charting
- Charting Elements
- Gantt Chart
- PivotTable
- PivotTable Calculations
- PivotTable Layout
- PivotTable Format
- PDF to Excel
- PDF-to-Excel Converter
- Excel to PDF Converter